Flashing stock firmware (OFW) on a Samsung Galaxy S9/Samsung Galaxy S9+
Pre-requisites
Before you can flash stock firmware on your S9/S9+, there’s a few things you’re going to need to have (done).
- You’re going to need a PC/laptop running Windows for this guide.
- You’ll need a USB cable to connect your phone to your computer.
- In developer settings, make sure USB debugging is enabled.
- In order to use Odin and flash stock firmware on your device, your bootloader needs to be unlocked. Do NOT just do this if you don’t know what you’re doing, some S9(+) devices will jail your bootlocker for 7 days if you don’t do it the right way. Make sure to do some resarch first.
- This is not really a requirement everyone is going to need, but realise that flashing stock firmware with the normal CSC file will factory reset your phone, meaning everything on your phone will be erased. So if you have anything important on your phone you don’t want to lose, back it up!
- Charging your phone’s battery. Make sure it’s at least somewhere above 60%, just in case. The closer to 100%, the safer. You can’t charge your phone during the flashing process.
Preperations
This is a list of all the things you’ll have to prepare in order to install stock firmware on you S9(+), make sure to follow all of these steps:
- First, go to Settings, then go to About phone, and note down your model number. You should see something like this: modelnumber picture
- Afterwards, go to SamMobile. Click on the join button and sign up. You can choose whatever membership you want, the free one is sufficient for what we need. After signing up, verify your email address, then go to the firmware page on SamMobile. Enter your device’s model number and your country code. You should see a list of firmware versions for your device. For example, this is what it looks like for my device:
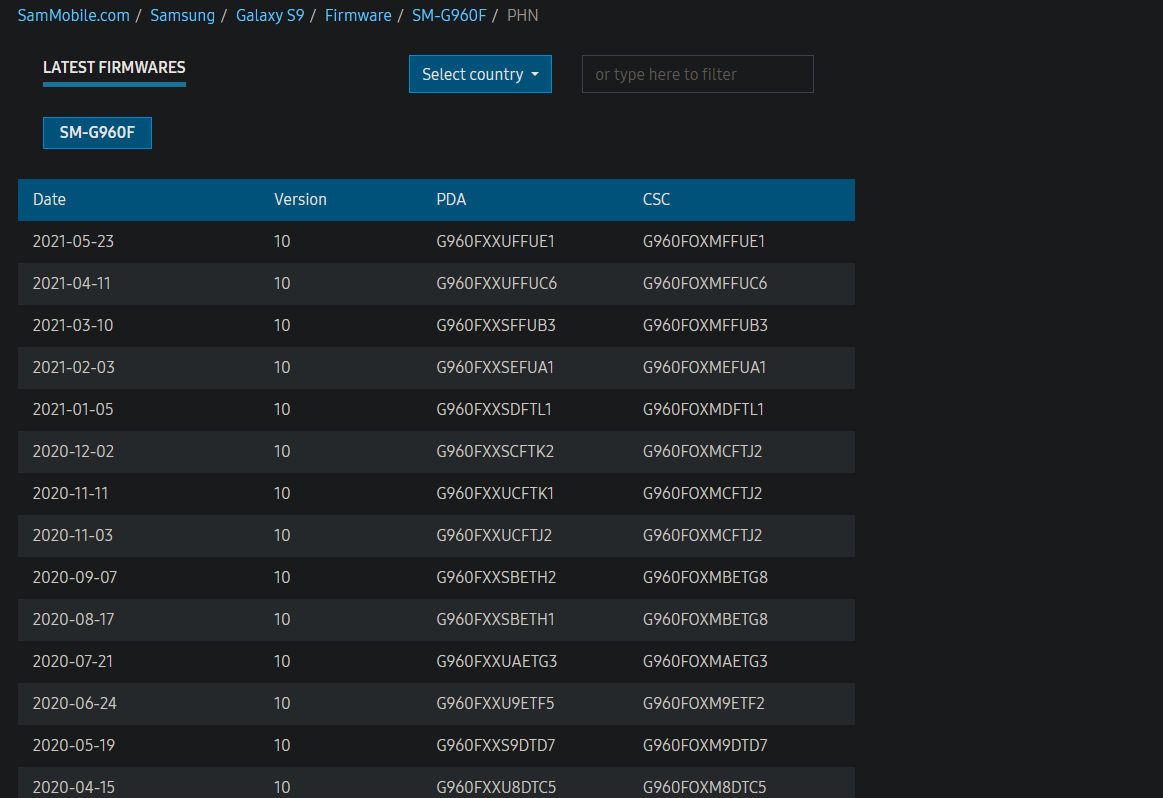
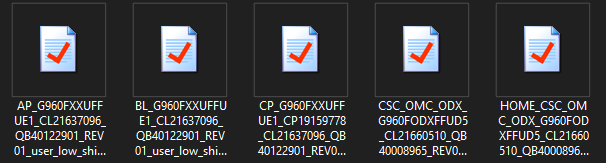
Click on the version you want to install on your device. Check if the country box contains the correct information; it should display the country in which you bought your phone and the provider from whom you bought it. After making sure that’s correct, click wait and download if you chose the free membership or fast download if you chose a premium membership. Wait for 30 seconds and hit Download. Choose to save the zip file, and let it download. When the download is done, unzip the .zip file (using a program like WinZip or 7-Zip (my personal preference)). You should have five files in the decompressed folder, looking something like this:
- In order to install stock firmware on your S9(+) with Odin, you’ll be needing the Samsung USB Drivers for Windows. On the page, click on SAMSUNG_USB_Driver_for_Mobile_Phones.exe(vx.x). Download the executable, run it, and follow the steps in the installation wizard.
- Next up, go to the Odin Download website. Download the latest version of Odin Download. This is the software we’re going to use to flash the stock firmware onto your device. Unzip the files. You should have the following four files in the decompressed folder:
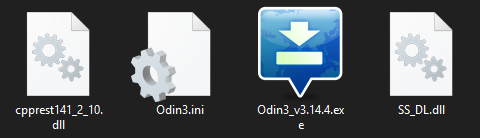
The Odin software is portable, so there’s no need to install anything.
If you’ve followed the steps above, you should now have:
- A folder with stock files for your S9(+)
- A folder with Odin Download
- The Samsung USB Drivers installed on you computer
- A Samsung Galaxy S9 or S9+, with a well-charged battery, an unlocked bootloader, and USB debugging turned on
If so, you’re ready to move on to the actual flashing of the stock firmware.
Flashing stock firmware with Odin
- Start by running the Odin executable we downloaded earlier. A warning will show up, but you can ignore it as you’ll be fine if you followed all the steps above.
- The next thing you want to do is boot into download mode. With some custom roms/software you can do this from your phone with fair ease, but I’ll use the way everyone can do it on their S9(+).
- Turn off your device.
- Make sure your phone is not charging during this process, it should be charged beforehand.
- Now we’re going to turn it on again, but we’ll hold the following combination of buttons at the same time: Bixby button + Power On + Volume down.
- Your phone should now have gone into download mode. You should see a warning about a custom OS being dangerous. Ignore this.
- Press Volume up. Your screen should now say Downloading… and some other instuctions. Ignore this and connect your phone to your computer with a USB cable.
- Now go to Odin on your computer.
- You’ll see five fields with acronyms in front of them. This is where the stock files will go. It should look like this:
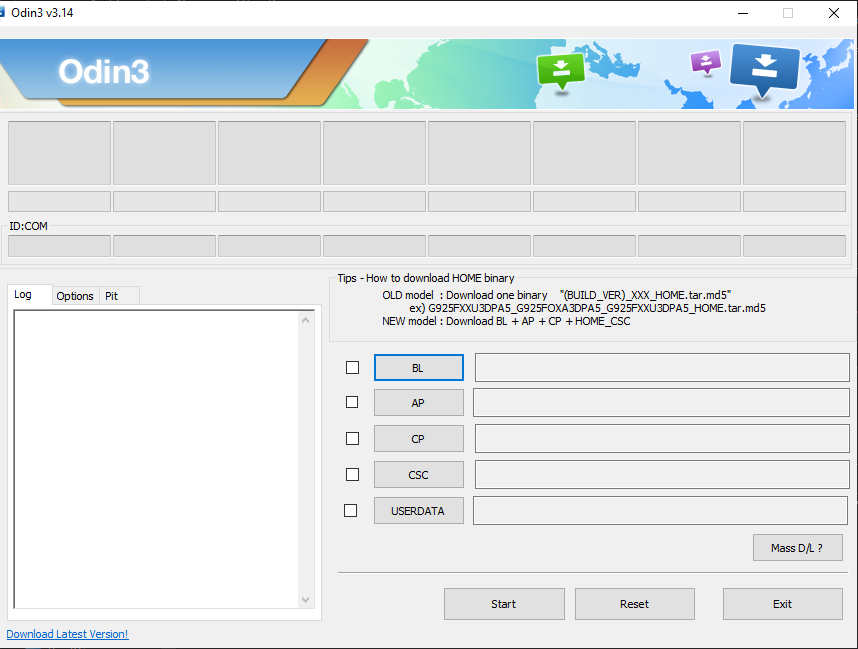
- Click on the first one, BL. Go to the folder with the stock files you download earlier and choose the file which starts with BL. Do the same thing for AP, choosing the file starting with AP, CP for CP.
- You’ve probably noticed how there’s still two fields left. The USERDATA field will remain empty. In the CSC field, you have two options. You can choose the file starting with CSC to wipe all your phone’s data after flashing the stock rom, or otherwise the file starting with HOME_CSC to keep your phone’s data after flashing the rom. If you’re going with the data wipe, do not forget to backup any important data beforehand.
- Now your Odin window should look something like this:
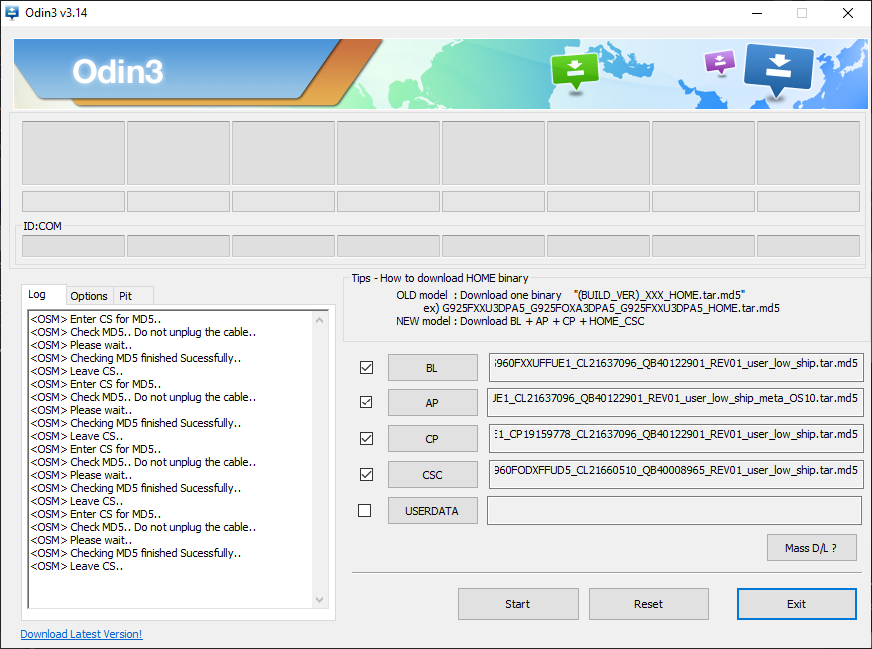
If that’s the case, go ahead and make sure the boxes Auto Reboot and F.Reset.Time in Odin are ticked. - Now if you’ve done all of this, your phone is connected, and you’re ready, hit the Start button.
- Wait for the flashing process to finish. You’re phone will reboot, which will take a few minutes. After rebooting, disconnect your phone from your computer. If everything went right, you have now succesfully flashed stock firmware onto you Samsung Galaxy S9/Samsung Galaxy S9+! Enjoy.